Hello and Welcome!

Hello and Welcome!

My name is John Nicholl. I'm an Industrial Design student, based in Adelaide, South Australia and this is the beginning of somewhere that I can think aloud and share my work.

This blog is somewhat outdated.
More current projects are posted on my website.

Twitter, Instagram and Tumblr: jwrnicholl

Showing posts with label ABS. Show all posts

Saturday, October 4, 2014

Studio 4 Journal, Week 5

This Week

  • Button Tests
  • CAD Flat Pattern
  • Filling and Sanding Base
  • Project Plan
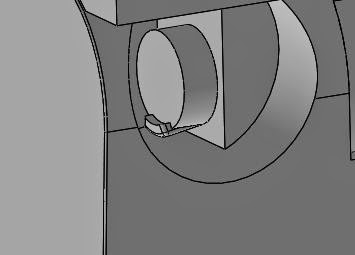
Button Tests - As far as testing the buttons go, I've 3D printed and made sure that both brightness and power buttons will physically work. The Brightness button went through some pretty major changed from the first attempt. I've ended up using the flexible abilities of the ABS to hold my Alucobond button in place, while still moving enough to engage the button held beneath. The reason for the final design of the brightness button's bracket is because there needs to be adequate clearance for the button to actually move in.

The Power button was pretty much the same as what had been tested before, so the only adjustment was to file away some plastic which was preventing the button from travelling all the way down.


CAD Flat Pattern - After working out the details for mounting the button and switch, I've drawn out a CAD file which has locating holes for the small parts and also details to cut thin flanges out of the Alucobond to cover the edges of material. I will finalise the details of this on Monday. Speaking of which I realised just now I haven't resolved how to mount the power adapter to the arm.


    Filling and Sanding Base - This step is still part way through, thought I've gone with a 3D printed insert and the part is part way through being primed and sanded. The 3D printed part looks like it will serve its purpose quite well. You can see in the photos how I've cut a test piece that clearly shows how the sphere will be supported away from the cement in the base.


    Project Plan - This is the first time I've used a Gantt chart to try and plan and entire project's movements... I know I've missed things but I guess that's the whole point. If I don't know I've forgotten something, I can't possibly remember it.

    I've used a program called GanttProject. Super easy to use.


    Friday, July 25, 2014

    Printing stuff

    I bought a 3D printer. Its an Up! Mini, the same as what we've been using at Uni.From all that I looked at, its the best solution for me both in terms of size and price. Hello fast prototypes!

    The night I pulled  the printer out of the box and set it up and went about designing a small hook that i could hang my keys off of. My key ring isn't just a boring ring with keys though. I found a neat little product on EBay that have a simple mechanism that allows me to change and rearrange my keys quickly and simply. For me, keeping light pockets is something I strive for, especially since my last good pair of jeans are full of holes that my keys made.


    The slider in the middle of the disc unblocks a space for the little pins to slide out and remove whatever  you've got attached to the ring. Mostly I just swap out car or bike keys, but if I'm taking public transport for a night in the town I wouldn't bother with anything but my house keys.

    The aim of the design at the beginning was to have a place to store the keys I wasn't using or to hang up the whole lot when I'm home. The most frustrating thing is trying to find my keys, wherever I would throw them down. One thing that remained a constant was the ability to use one of those double sided tape things for wall hooks to hold it up.

    The first iteration left the disc hanging loosely and there were some problems with sizes for fitting the pins that held items that were not attached to the disc.


    In the second step I had problems fitting the disc onto the interface I designed for it. Also the printer wasn't handling the holes very well.


    For the third I added supporting material around the holes and adjusted the shape and size of the interface that held the disc. Also i found that the flat back area that the tape would stick to was intruding on the space needed to slide the pins in. Small cutaways fixed that.


    The final design just took a few minor tweaks to get the disc interface to work a little smoother, and then i smacked it on the wall. Best key solution I've ever had.


    Some criticisms could be made about the design. The way the unused pins are held so closely together might be hard for some people to manage. There is definitely a smoother way of hanging something on a wall. In fact having just types that I've had a new idea. I'll have to explore that another time and post an update. To contest the argument that the pins are too close, I would say that for something which only plays a small role in my life, it should only consume a small portion of space and also that the angled faces combat the clutter well enough. Hope you like it.

    If you're interested in the key ring... Here is a link to the EBay page.

    Friday, April 4, 2014

    Computer Modelling Journal, Week 5

    The last week! I've just submitted my work online and I've got nothing left to do but go to the pub. WOO

    Not the usual day for a post but I need to update what I've been doing for this last couple days. The basic gist of what I've done is the Arm and Hand parts.

    Initially the arm was giving me some grief. I can't say its perfect, but frankly I'm sick of it and the fact that I'm just re-creating something that already exists, I'm not fussed. Its close enough! I had a few problems with trying to get the arm to have that strait edge on what would be the inside. (the part that touches the body) If you look at the post from last week, you'll see the line I'm talking about. Attempt 1 (left) and Attempt 2 (right) are alright... but the final shape I went with is a little bit less awkward. (bottom) The line at the bottom of the flat face there comes about as a result of an extrusion from the front face where the hand goes. I'd like to have made it a little different but I kept getting one of those really vague errors that Solidworks loves to give. So i found a workaround with a slightly modified sketch.

    I have to say my favorite part was the hand. It really has a lot of detail, and the shape is awesome but without being too complex. Basically I just went through with a revolve at an angle to make the stick, then extruded the hand shape from the Top Plane.

    Part of the assignment was also to build an accessory. I went with a cape. Following the same concept as a backpack and the bear accessories, it clips in under the  head on the neck piece of the body. The bulk of the detail is an absurd spline sketch at the bottom of the cape, which is lofted up along some guidelines to where it attaches to the mini-figure. The bottom also uses a spline, but this time a lofted cut which just takes away that boring bottom edge I'd have ended up with without it.


    Finally... This is what the whole Lego Mini-figure looks like!


    Monday, March 31, 2014

    Computer Modelling Journal, Week 4

    I am currently working on the arms piece. There's a lot of consider when trying to understand the shape. I am being encouraged to avoid doing lofts and then just adding a radius to round the corners, except that from what I can tell, that is actually what the shape is. There its almost like there's an 8th of a sphere at the shoulder, then it rounds off and flattens out down to the elbow and is just a little tube from there on. I don't understand why I should be making it more complicated that it already is. Its not like a sports car where the shapes are supposed to look sleek and organic, this is a mini-figure's arm. So far I'm working with this...


    I took an old Lego piece and cut the joint off its shoulder to get a nice close up scan to draw some construction over.


    Sick of arms...

    Monday, March 24, 2014

    Computer Modelling Journal, Week 3

    Why does Solidworks have to show me error messages every time there is something to complain about? There should be errors displayed in a news feed style in the corner of the screen so that I can see when they occur, then address them accordingly. No, I do not want  to use the wizard to solve the problem... It doesn't work. I do not want to have to deal with all your popup prompts each time I rebuild the model which I'm troubleshooting. I'll fix it when i fix it!

    Problems this week...

    There is a lip overhanging there which I need to pull back... (Left) But that won't happen till i figure out why the holes in teh back of the Lego mini-figure's leg is not being centered and causing that tiny blip. (Right)


    Good news is that it looks pretty sweet so far. I've made a little block for it to stand on so that i can get some good measurement and alight the pieces and features to accurately fit onto a real Lego brick. Also, mirroring the leg piece was such a sleek process. I don't like having to rebuild the sketch as i make adjustments though.


    I also made the head... I like this one.


    Things left to do are the arms and hands. I don't feel like they will take as long because they don't connect to and Lego bricks. At the moment I'm still not sure what accessory I want to make for the mini-figure. Not to fear though... it can't be that hard, no matter what I decide to do.


    Monday, March 17, 2014

    Computer Modelling Journal, Week 2

    This week I have been working on the Lego person model. The end goal is to have full technical drawings for all the parts of the Lego person.

     I started with the head, mainly because it has the least complex shape. I went and bought a new Lego person from the shops so that I could have a little comparison between the Lego I already had at home. The head pieces have no longer got a hole in the top, which is kinda confusing. Isn't that a choking hazard?

    As for the body, there is a hell of a lot of detail. They've gotten smarter about how they Lego's internal structure works. There's more emphasis on supporting ridges instead of just having thicker walls. There's a small area just inside the sides of the piece for the legs to slide into, as well as all the crazy convoluted support structures for making sure the pieces clip together properly. I've made sure to take careful note of any small details, especially around the arm sockets and the area that holds the legs. So far, this is what I've got in term of the model. I'm thinking I'll scan the Lego's decals and add them into the model, then do a comparison between the two.

     Maybe I should get another Lego person and cut it open to get more detail....


    After spending a good 10 minutes jotting down some measurements from the legs, I realised that the sizing of the bottom of the foot is dictated by the spacing of the Lego brick's notches. The legs also have a slight angle on their outer side. There's so much more detail that you would care to consider at a glance. So far I've modeled the leg, but I'm still unsure about the spacing and how it will go together with the hips. There's also the question about weather or no I'm happy with the way I've hollowed out the top section. It's not only a difficult and unusual shape in there, I'm not sure I fully understand it either. (Below Middle)


    This week I've been abusing the "Convert Entities" tool to project geometry through to the face I'm working on. In Solidworks it took a little bit of tinkering to figure out how to do it, but eventually I got there. Also I had some trouble with trying to mirror a feature but then not being able to merge the body after I'd finished with the mirror tool. The work-around was to just go back and mirror the sketch I'd done a bunch more times to get the detailing inside the body part done. For all the parts I went with ABS Plastic (which is what Lego is made from) and a white mild gloss finish.

    Next week should be the arm and hand pieces. I'm not looking forward to the awkward angles and trying to measure them with the vernier calipers. I might touch on the hips too.